

Hello and welcome to the Stamping Inkspirations Blog Hop for July.
This months theme is Christmas in July!
YAY!
I love making Christmas cards and never get them made early enough. I always have good intentions of creating them throughout the year. I do know some people who make their cards well in advance and I am in awe of them.
For this months theme I decided to make a Christmas card that involved using Blending Brushes. I love creating with the brushes and love all of the sky images others have created with the blending brushes and shared. I have used the Perfectly Plaid stamp set for my tree.

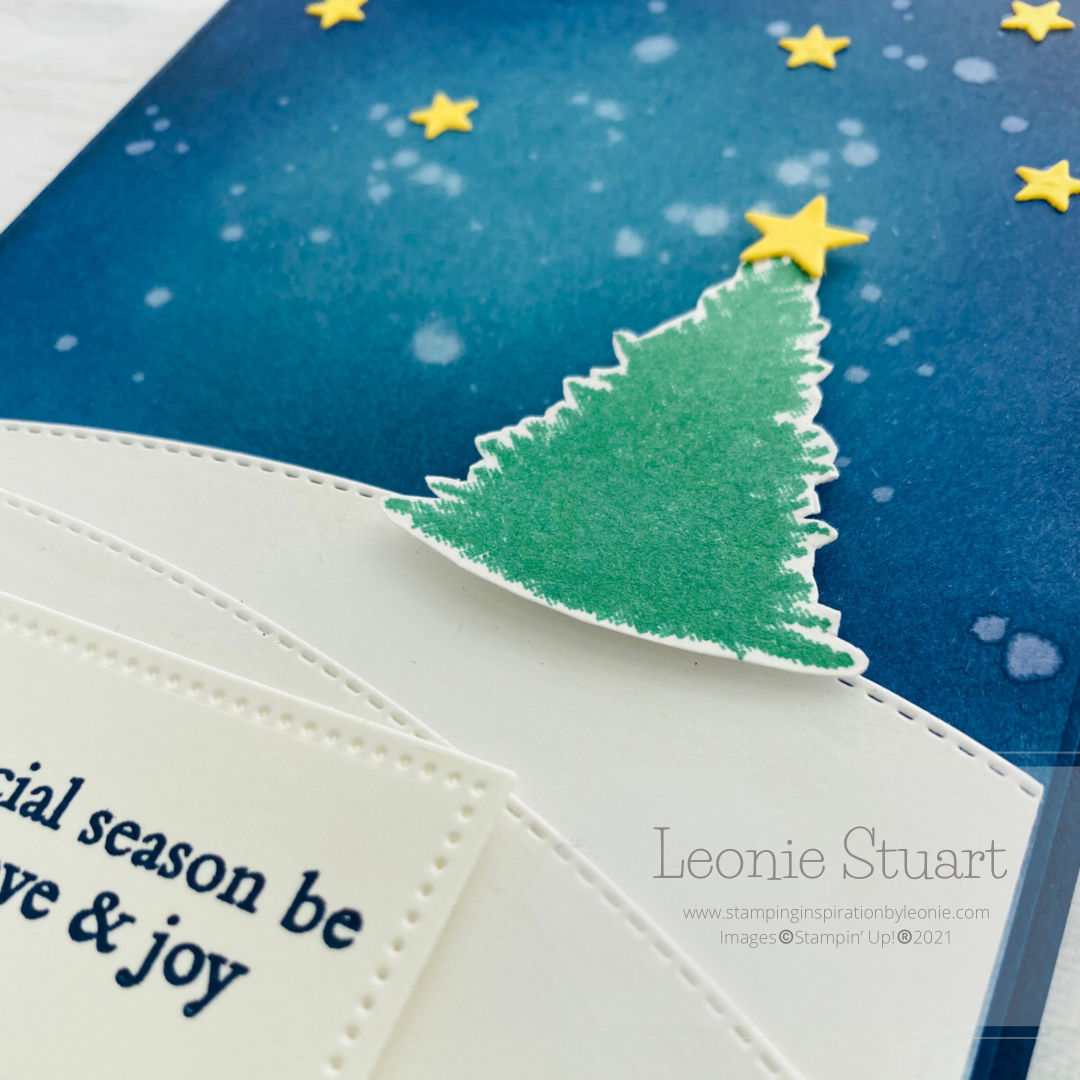
- Start with a Night of Navy card base Measuring 21cm x 14.9cm scored and folded in half
- Cut a piece of Basic White card stock to measure 10cm x 14.3 cm. Starting with the Balmy Blue ink start blending in the top third of the card stock in a circular motion. As you go out towards the edge of the card stock use the Misty Moonlight and then Night of Navy ink to make it darker as you go. Leave to dry then flick with small drops of water. Again leave to dry
- Stamp the tree in Just Jade ink on Basic White card stock and punch out using the Tree Builder Punch
- Cut a piece of Basic White card stock to measure 10cm x 14.3cm and use the gently curved die from the Basic Borders Dies to create two rolling snow hills for the foreground. They should be 10cm across the bottom and one 5cm high and the other 4cm high. Adjust the curve for the foreground you prefer. Glue these with the largest underneath at the bottom of the Blended background layer. Use wink of Stella on the stitched top of the Basic White foreground layers to imitate sparkly snow
- Secure the tree to the top of the snow layers using Dimensional's
- Die cut the stars using the star dies from the Give it a Whirl Dies in Daffodil Delight. Glue these to the blue background layer around the tree with one on the top of the tree
- Adhere the scene layer to the card base using glue
- Stamp the sentiment in Night of Navy ink on a piece of Basic White card stock and use the Tailor Made Tags Die to cut it out. Tie a length of Linen Thread in a bow at the top of the tag. Then secure the sentiment tag to the bottom left of the card front
Up next on the blog hop is the very lovely and talented Jo Blackman.
Make sure you click on the next blog button to head to Jo's blog post for more inspiration

Angie McKenzie ● Libby Fens ● Karen Henderson
Annette Ball ● Tricia Butts ● Leonie Stuart
Jo Blackman ● Aurélie Fabre ● Mo Rootes
Susan Simpson ● Gez Carpenter ● Jan Musselman
Thanks you so much for visiting my post today. I am very grateful.
Have a great day!

Product List
 |  |  | |
 |  |  | |
 |  |  |  |
 |  |  |  |
 |  |  |  |
")

Beautiful card! I love your blending for the sky!
ReplyDeleteThank you x
ReplyDeleteSuch a pretty card Leonie, love the sky x
ReplyDeleteWonderful card Leonie! The night sky is gorgeous.
ReplyDeleteBeautiful card Leonie, I love the sky and stars, thanks for sharing x
ReplyDeleteLove the sky and stars background!! Very cute card!! Thanks for the tutorial!!❤️
ReplyDeleteThe blended sky with the bright stars is gorgeous - thanks for sharing.
ReplyDeletea very sweet menu that makes you want hot chocolate in front of a window where it is snowing ... bravo!
ReplyDeleteSuch a lovely card with so many AMAZING elements from the dies to punch to the blending brushes and of course the linen thread! Love it! And now the Give it a Whirl Dies are on my next order. Thanks for hopping with us, Leonie, and for enabling me! xx
ReplyDelete