Monday 31 January 2022

Stampers Showcase Blog Hop - It 's Time for a Sale-a-Bration!


Hello and welcome to the first Stampers Showcase Blog hop for 2022!

HOORAY... Sale-a-Bration! is on again at the moment and this month we are featuring products that are available for free during Sale-a-Bration!

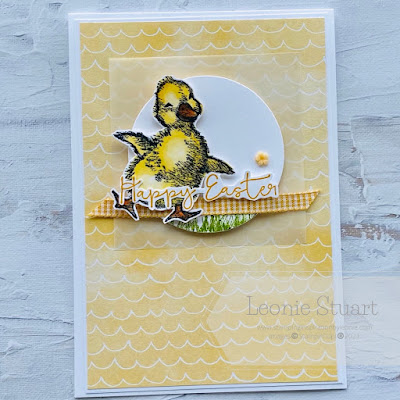
I have used the sweet Friendly Hello Bundle from Sale-a-Bration. This bundle includes a stamp set and coordinating Designer Series Paper. You are going to love this bundle.

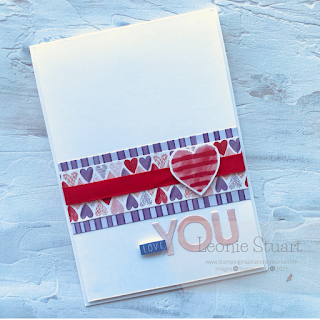
Here is my card for this months challenge.


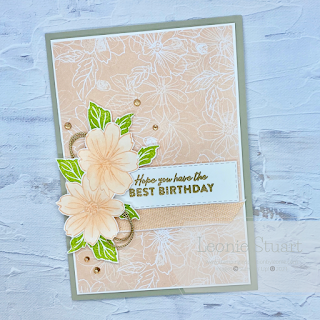
  1. Start with a Sahara Sand card base measuring 21cm x 14.8cm scored and folded in half
  2. Cut a piece of Basic White card stock to measure 9.7cm x 14cm
  3. Cut the DSP to measure 9.5cm x13.8cm
  4. Glue the DSP to the Basic White Layer then pop this layer up using Dimensionals on the card front
  5. On a piece of Basic White card stock stamp the flowers in Petal Pink and the Leaves in Granny Apple Green. Colour the flowers in with Petal Pink Stampin' Blends
  6. On a piece of Basic White card stock stamp the sentiment in Versamark™ ink, sprinkle with Gold Embossing Powder and set with the heat tool. Die cut with the small Stitched Rectangle Die
  7. Adhere to the card front using Dimensionals
  8. Using Tear n' Tape adhere a *cm length of Pale Papaya and White Ribbon below the sentiment layer and banner the end
  9. Gather a 25cm length of the gold tine and adhere to the left hand side of the sentiment using Tear n' Tape
  10. Adhere the flowers to the left hand side of the sentiment on top of the gold twine using Dimensionals. Then use glue and Dimensionals to adhere the leaves
  11. Adhere 5 of the Champagne Rhinestones around the floral spray


Up next on this months Blog Hop is the lovely Stephanie Nash.

Make sure you click on the next button below to keep hopping to see all the crews amazing Sale-a-bration projects.


Have a creative week!


Product List

Wednesday 26 January 2022

Global Design Project #327 - Love - Valentine


Today I have  created for this weeks Global Design Project. 

 The theme is Love- Valentine

I have created my card using the gorgeous Sweet Talk Designer Series Paper and the fun Playful Alphabet Dies. I love the fresh look of the DSP against Basic White card stock.


  1. Start with a Basic White card base measuring 21cm x 14.9cm scored and folded in half
  2. Cut another piece of Basic White card stock to measure 10cm x 14.3cm
  3. Cut a piece of the Sweet Talk DSP  with heart rows into a 10cm x 2.5cm. Roughly the size of two rows of hearts 
  4. Then cut a !0cm x 3.5cm pice of the Striped DSP and glue the heart DSP to the top then glue to the bottom third of the Basic White layer measuring 10cm x 14.3cm
  5. Tie a 12cm length of the Real Red ribbon to the centre of this and secure at the back with glue dots.
  6. Secure the card front layer to the base card using Dimensionals
  7. Fussy cut the heart from the DSP and secure it to the right hand side of the layers with Dimensionals
  8. Die cut the word "you" out of the DSP using the Playful Alphabet Dies and glue below the DSP and ribbon layer on the card front
  9. Fussy cut the word "Love' out from the DSP. Then adhere it to the Card front using Mini  Dimensionals


This was a lot of fun to make. The Sweet Talk DSP is so cute.

Thank you for stopping by today. I hope you are making Valentine's Day cards this year!

Take care!


Product List

Wednesday 19 January 2022

Global Design Project #326 - Sketch

 Hello and welcome to my blog post. I really enjoyed creating for the Global Design Project last week. I have some extra time to get in the craft room at the moment and wanted to join in the fun again this week for the Global Design Project Sketch challenge. 

I have had the very sweet Easter Friends stamp set and had not had a chance to use it until today. I thought a sweet Easter card would work well with this sketch. 


Here is the GDP Sketch.


Easter Friends Card 


    1. Start with a Basic White card base measuring 21cm x 14.8cm scored and folded in half
    2. Cut another piece of Basic White card stock to measure 10cm x 14.3cm
    3. Cut a piece of the Daffodil Delight DSP to measure 9.7cm x 10cm and glue this to the layer above. Then adhere both to the card front paying attention to the scallops on the DSP
    4. Cut a piece of White Vellum to measure 7.5cm x 7.5cm and use glue at the centre of this th adhere to the card front
    5. Use a layering Circle die to die cut a circle. Then stamp the grass in Granny Apple Green ink on the bottom of the circle. Adhere this to the card front  in the centre of the Vellum using Dimensionals
    6. Stamp the Duckling in Memento™Tuxedo Black ink on a piece of Basic White card stock then colour with So Saffron, Daffodil Delight and Pumpkin Pie Stampin' Blends. Fussy cut the Duckling with Paper Snips. Pop up on circle layer using Dimensionals
    7. Stamp the sentiment in Daffodil Delight and cut the sentiment out close to the words using Paper Snips. Use dimensionals and glue to adhere this on the top of the Duckling
    8. Cut a 10cm length of the Bumblebee Gingham Ribbon and glue this to the circle layer using Tear n Tape. Under the Ducklings feet. Snipping the ends on an angle
    9. Glue one Pale Papaya Loose Flower Flourishes to the circle layer using glue
Many thanks for stopping by my blog today!

I hope you like my sweet Duckling card. It came together quite easily. I would encourage you to join in the fun of playing along with the Global Design Project. I have been a huge fan of their projects for many years now. 

Have a creative week!


Product List