Monday 31 August 2020

Stampers Showcase Blog Hop - A Holiday Preview


Hello and welcome to my blog post for the August Stampers Showcase Blog Hop.

This month we are featuring products in the current Mini Catalogue.

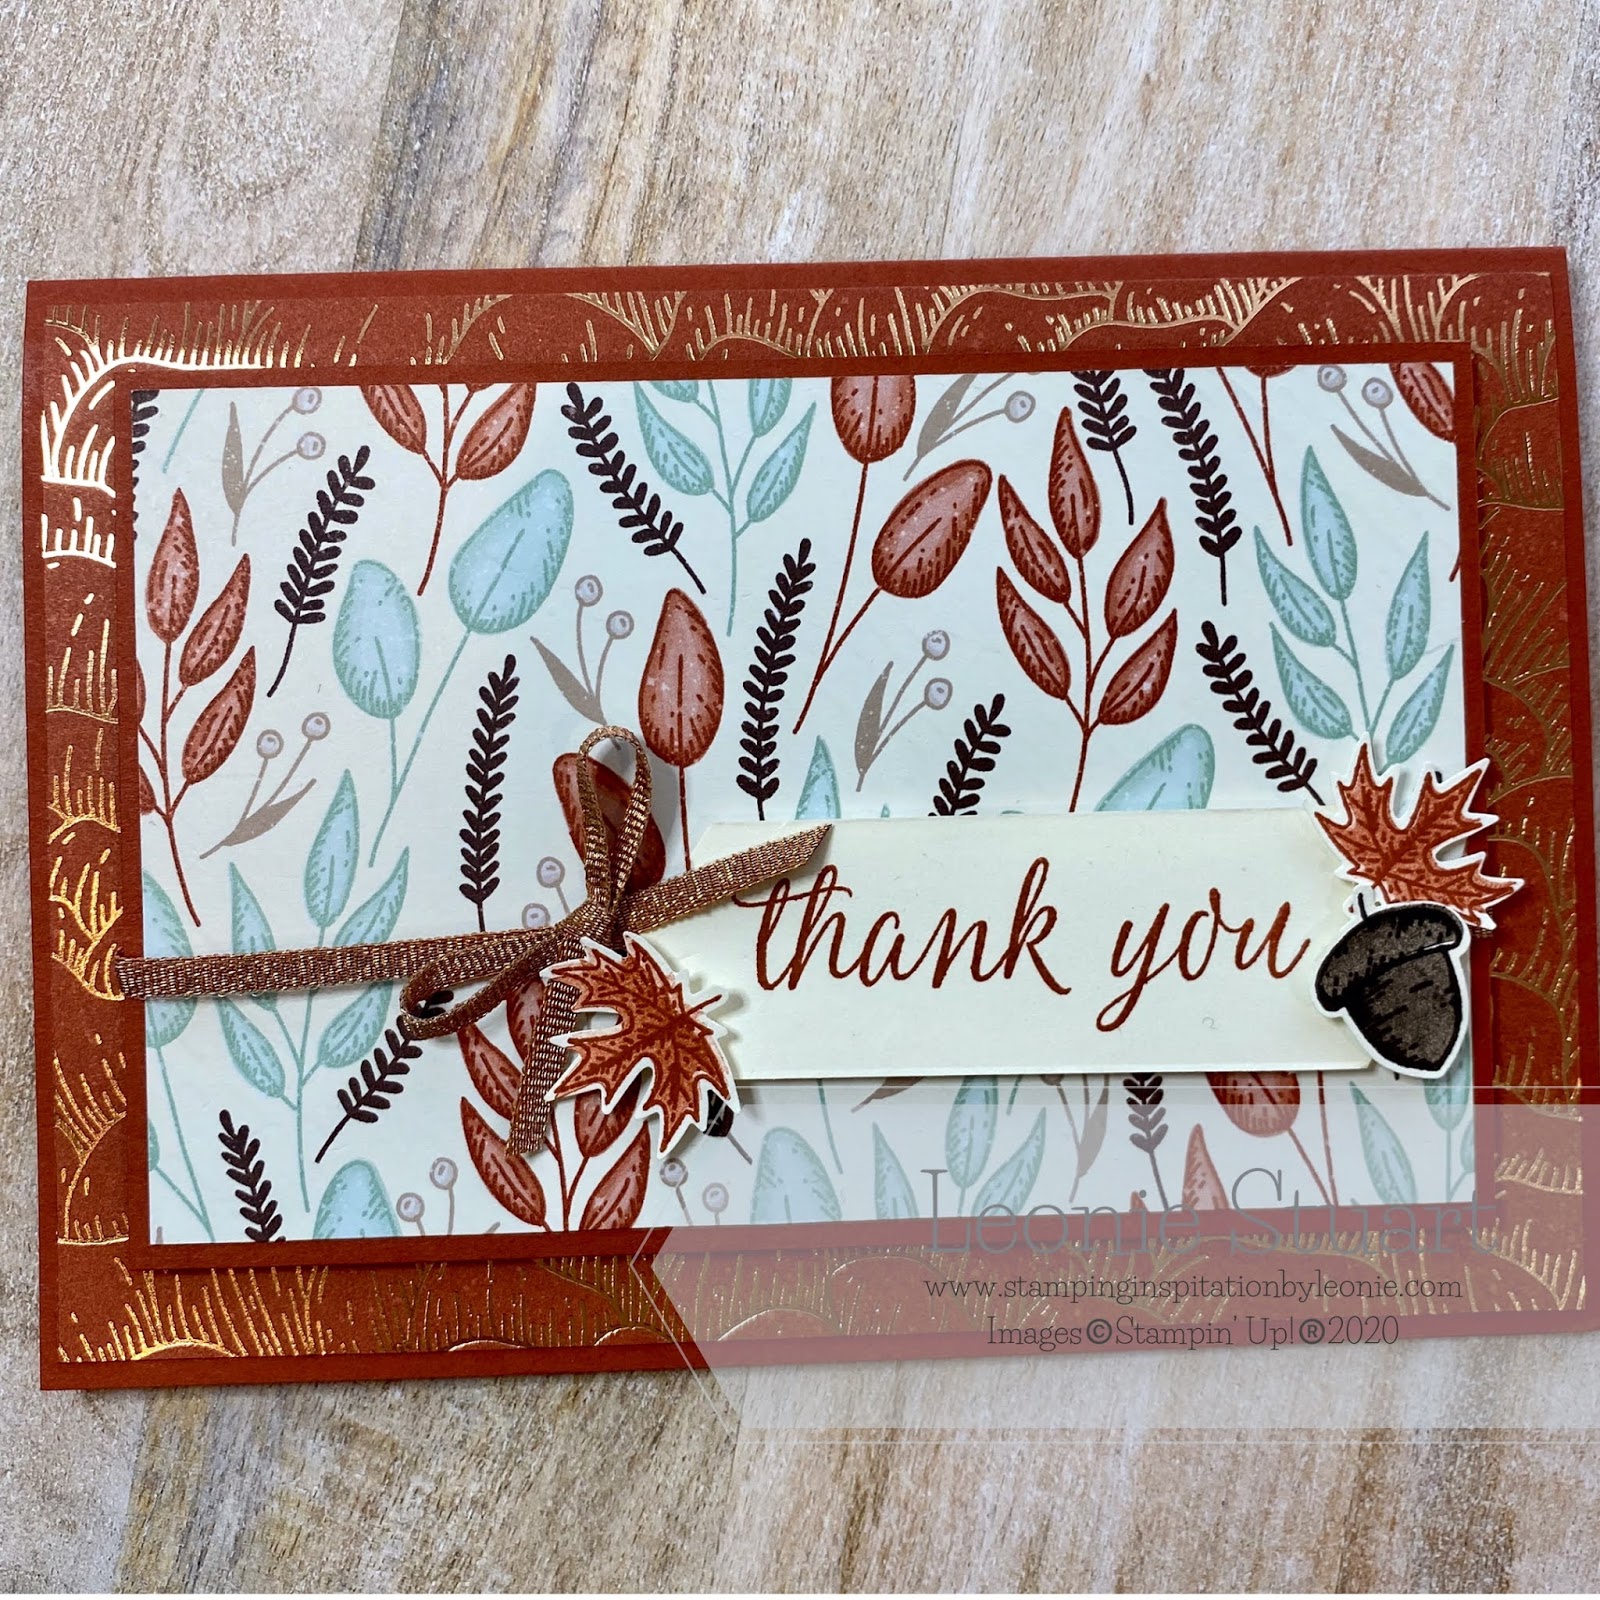
I have used the Beautiful Autumn Bundle with the Gilded Autumn Specialty Designer Series Paper for my card from the August - December 2020 Mini Catalogue.


  1. Start with a Cajun Craze card base measuring 21cm x 14.9cm scored and folded in half.
  2. Cut a piece of the Cajun Craze and Bronze Gilded Autumn Specialty Designer Series Paper 10cm x 14.4cm and glue this to the card base.
  3. Cut a piece of Cajun Craze card stock to measure  to measure  8.4cm x 12.8cm.
  4. Cut a piece of the patterned Gilded Autumn Specialty Designer Series Paper to measure 8cm x 12.4cm and glue this to the 8.4cm x 12.8cm piece of Cajun Craze card stock.
  5. Cut a 13cm piece of the copper ribbon from the Basket Weave and Metallic Ribbon Combo pack and secure it to the bottom third of the patterned DSP layer with Tear n Tape at the back.
  6. Cut a pice of Very Vanilla card stock to measure 2.5cm x 12cm. Stamp the Thank you sentiment in Cajun Craze. Punch out each end with the Lovely Labels Pick a Punch.
  7. Secure the sentiment layer over the top of the ribbon using Dimensionals.
  8. On a piece of Very Vanilla card stock stamp the Acorn outline in Early Espresso ink then stamp with stamped off Early Espresso ink to fill the image. Stamp the outline of the maple leaf twice with Cajun Craze ink then fill with stamped off Cajun Craze ink. Punch these three elements out using the coordinating punches from the Autumn Punch Pack. Secure these to either side of the sentiment using Dimensionals.
  9. Tie another pice of the Copper Ribbon in a bow on the left hand side of the sentiment.
  10. Pop the patterned DSP layer up on the card front using dimensionals.


For the card centre
  1. Cut a piece of Very Vanilla card stock to measure 10cm x 14.4cm
  2. Stamp the sentiment in Early Espresso in the centre of the card stock.
  3. Cut a piece of the striped Gilded Autumn DSP to measure 1cm x 14.4cm. Glue to the bottom of the Very Vanilla card stock.
  4. On a piece of Very Vanilla card stock stamp the Acorn outline in Early Espresso ink then stamp with stamped off Early Espresso ink to fill the image. Punch out with the coordinating punch and glue to the bottom right side on top of the DSP.
  5. Glue this layer to the card centre


Make sure that you hop around each persons blog to see their fantastic creations!

Next up on the blog hop is the very talented Stacey Marsh!

Make sure you hit the next blog button to go to her blog!


Thank you for visiting my blog today -  you are appreciated!


Product List

Wednesday 26 August 2020

Colour INKspiration #84


Hello and welcome to my blog post for Colour INKspiration #84!

Another great inspiration photo for this challenge! I love the beautiful colours in this image.


So many ideas ran through my head for this colour challenges. I wanted to challenge myself to create something that I have not done before. I settled on the floating frame technique with a twist. Read on to see how this was created.


  1. Start with a Rich Razzleberry card base measuring 21cm x 14.9cm scored and folded in half.
  2. Cut a piece of Whisper White card stock to measure 10cm x 14.3cm.
  3. Cut a piece of Vellum to measure 10cm x 14.3cm.
  4. On Whisper White card stock stamp the leaves and bud branches in Garden Green, Just Jade, Magenta Madness and Roccoco Rose ink. You can decide what colour to use for each image. After stamping the images die cut using the coordinating die from the Forever Flourishing Dies.
  5. Arrange these around the edge of the 10cm x 14.3cm Whisper White card stock. Place Press n' Seal (you can purchase this online) over the top of the die cuts and make sure that they are all sealed to the Press n' Seal. Flip this over and apply DImensionals to the back of each die cut. Remove the Dimensional backing and place back over the top of the Whisper White adhering the Dimensionals.Trim the die cuts hanging over the Whisper White card stock. Glue this to the card base.
  6. Stamp the sentiment from the Forever Fern Stamp set in Versamark™ ink in the centre of the Vellum piece. Sprinkle with Gold Embossing Powder and set with the heat tool.
  7. Using a very small amount of glue on each die cut using a sponge to apply glue then adhere the Vellum sentiment layer over the top.
I hope you have enjoyed reading how this card came together. I love the look of the Vellum over these colours and how it softens the card. Perfect for a Wedding or Engagement card.

I hope you and your fiends and family are keeping well at the moment. This virus has certainly changed the world we live in. I hope you are reaching out to family and friends and keeping in touch in the new way of things.

Thank you for visiting my blog - you are appreciated!

Product List
Heat Tool
[129056]
$50.00

Wednesday 12 August 2020

Colour INKspiration #83


Hello and welcome to my crew post for Colour INKspiration #83!

How gorgeous is the inspiration photo. Wouldn't you feel refreshed after spending the night in that space! Just a stunning room.


I had many ideas for this challenge.....as usual! I decided to use the  Plaid Tidings Designer Series Paper with the Bumblebee Card Stock and it just came to me when I picked up the Label Me Lovely Punch for the Dressed To Impress sentiment. The little flower sprays in this stamp set are very sweet.


  1. Start with a Bumblebee card base measuring 21cm x 14.9cm. Scored and folded in half.
  2. Cut a piece of Bumblebee Card Stock to measure 10cm x 14.4cm for the matt.
  3. Then cut another piece of Bumblebee Card Stock to measure 9.7cm x 14.1cm and run this through your die cutting machine with the Tasteful Textile 3D Embossing Folder.
  4. Cut the piece of the Plaid Tidings DSP to measure 9.7cm x 6.5cm.
  5. Cut a piece of Bumblebee Card Stock to measure 9.7cm x 4cm . Use the Ornate border die to create the pretty edge on each 9.7cm side. Cut this piece of card stock in half so that both pieces have the border on the side. Glue both of these pieces to the 9.7cm sides of the DSP.
  6. Stamp the sentiment in Memento™ Tuxedo Black ink on a piece of Whisper White card stock measuring 8cm x 8cm. Punch out with the Label Me lovely Punch.
  7. On a scrap pice of Whisper White card stock stamp the two flowers in Memento™ Tuxedo Black ink. Colour the flowers in with the Bumblebee Stampin' Write Marker and the leaves in with the Mossy Meadow Blends. Fussy cut both these images.
  8. Tie a piece of the Linen Thread in a bow around the left side of the DSP/Ornate Border. Secure at the back with Tear n' Tape.
  9. Pop the DSP/Ornate Border layer up on the front of the Tasteful Textile embossed layer with Dimensionals. Glue this to the matt layer.
  10. Use Dimensionals to pop the layers up on the card base.
  11. Secure the sentiment layer to the front of the DSP using DImensionals and then the flowers with more Dimensionals ( I have used a lot of Dimensionals for this project - you can layer as you wish just using glue).


I hope you have enjoyed my project for this challenge!

I really enjoyed creating with this colour palette. Bumblebee is such a beautiful colour to work with.

I hope that you are going well at this time. So many of my friends are in strict lockdown in Victoria. 

Wherever you are in the world I wish you well - take good care!


Product List