

Hello and welcome to another fun Around the World on Wednesday Blog Hop!
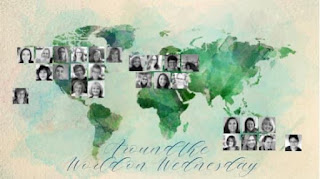
Each month a group of friends get together and create to a theme. You can see an image of the crew below and what part of the world we live in. Such a wonderful group with so much talent.
This months theme is CASing a Team member with a twist. So we have to CASe a team member that is chosen for us ......and.....spend some time talking with that team member getting to know them and about the project that you are CASing and what they would have done differently. I really loved this challenge and had a wonderful time chatting with my beautiful friend Angie McKenzie from Monclova, Ohio. We had the best catch up and Angie is the loveliest lady. I loved our catch up thanks to the wonderfully modern world we live in, we caught up via Messenger Video.

I love Angies projects and found it hard to chose amongst all her gorgeous creations. I settled on her beautiful card from August 2021 using the Flowers of Friendship Bundle to show an amazing technique. Click the link here to visit her post for this beautiful card here

So I set about finding a stamp set and mask that would work well together and fit on the front of my card. The Merriest Moments Bundle has beautiful Christmas Poinsettias and Holly. I thought it would look beautiful as a wreath for this card.
I have kept the layout the same but changed up the products used. As Angie and I spoke I discovered that she loved Merry Merlot and Evening Evergreen together as Christmas colours. I knew then that I had to create my card with these beautiful colours. I have used Basic White but Very Vanilla would also look amazing with this colour combination
Here is my CASed version of Angie McKenzie's stunning card (Nature's Inkspirations)

- Start with a Basic White card stock measuring 21cm x 14.8cm scored and folded in half
- Cut a piece of Evening Evergreen card stock to measure 13.3cm x 9cm
- Cut a piece of Merry Merlot card stock to measure 12.5cm x 8.2cm. Glue this layer to the Evening Evergreen layer
- Cut a piece of Basic White card stock to measure 12cmx 7.7cm
- On the right hand side of the Basic White piece of card stock use a decorative mask, Evening Evergreen ink and a blending brush to colour a small area underneath the wreath then glue to the top of the Merry Merlot layer
- Stamp the large and small Poinsettia in Merry Merlot ink on Basic White card stock. Three of each then die cut
- Stamp Multiples of the large and small holly and the small leafed branch in Evening Evergreen on Basic White card stock and die cut
- Cut a piece of the Evening Evergreen card stock to measure 1.5cm x 9cm. Stamp the sentiment in Versamark™ink, sprinkle with White Embossing Powder and set with the heat tool.
- Arrange the flowers and foliage in a half wreath and adhere to the card front and adhere using both Dimensionals and glue
- Adhere the sentiment layer over the top with a Dimensional at either end
- Cut 20cm of Linen Thread, twist it and adhere it ti the bottom of the sentiment securing at the back with Tear n' Tape. Tie another length of Linen Thread in a double bow and adhere to the left of the sentiment using a Glue Dot™
- Adhere the Basic White layer to the Merry Merlot and Evergreen layers then glue to the card front
- Secure three Rhinestone Basic Jewels to the centre off the three Poinsettias

I really enjoyed this challenge immensely. I cannot wait to see everyones projects for this challenge. Make sure you visit everyones post to see their CASed projects.
Up next is the wonderfully talented Rochelle Laird-Smith. Please click on the next button to go to her blog post for this months challenge.

Thank you for visiting my blog post today I appreciate it greatly!

") |  |  |  |
 |  |  |  |
 |  |  | |
 |  |  | |
 |  |  |  |
 |  |


")


