Wednesday 27 April 2022

Colour INKspiration #120


Hello and welcome to Colour INKspiration #120!

The crew would love you to join us for one of the challenges! It's so easy. Firstly, get some INKspiration by checking out all of the creations of the Colour INKspiration Crew in the challenge album on our Facebook page. Then you have 12 days from today to make and upload your creation to the Facebook Colour INKspiration Group. You don't have to have a blog to participate but if you do you can link back to your post. Make sure you use all of the challenge colours. You can also use neutrals such as Whisper White, Very Vanilla, Crumb Cake, Sahara Sand and Basic Black as well as Metallics. 

Not a member of the Colour INKspiration Facebook group yet? Just click here and ask to join Colour INKspiration, add the group to your favourites and share it with your crafty friends so they can join in the fun too. Make sure that you answer the joining questions. We can't wait to see what you create with these gorgeous colours.

This months inspiration image was chosen by crew member Jan Clothier. It is a gorgeous image and the colours are so very beautiful together.


I have chosen the soon to be retiring Sweet Ice Cream Bundle and Stitched So Sweetly Dies for my project this challenge  I felt the green colours would make a great mint ice cream. My favourite!! I love the font of the Happy Birthday sentiment too.


  1. Start with a Basic White  card stock measuring 21cm x 14.9cm
  2. Cut another piece of Basic White card stock to measure 10cm x 14.3cm for a matt layer
  3. Cut a piece of the Shimmery White card stock to measure 12cm x 9cm. Wet it with water using your Water Painter then use Polished Pink ink to completely colour the piece. Se aside to dry before die cutting with a Scallop Rectangle from the Stitched So Sweetly Dies
  4. Die cut the label from the Stitched So Sweetly Die set in Basic White card stock
  5. On Basic White card stock stamp the cone base in Crumb Cake ink then the cross hatch in Crumb Cake. Stamp one Ice Creams in Soft Seafood and the other in Just Jade. On the Soft Seafood Ice Cream stamp the Sprinkles in Just Jade. Punch out all three shapes.
  6. Stamp the sentiment in Misty Moonlight ink on Basic White card stock then fussy cut close to the letters
  7. Run a 13cm piece of the Misty Moonlight cotton ribbon across the front (in landscape) of the Basic White Matt layer and secure at the back using Tear n' Tape 
  8. Adhere the Polished Pink Scallop Rectangle to the card front using Dimensionals
  9. Pop the label up on Dimensionals and adhere to the centre of the card
  10. Use Dimensionals to connect the cone to the two Ice Creams and pop this up on the label layer
  11. Adhere the sentiment across the front of the Ice Cream using Dimensionals at each end and glue in the centre
  12. Secure three of the Iridescent Rhinestones to the label layer
  13. Tie a 12cm length of both the Misty Moonlight Cotton Ribbon and a 12cm length of the Silver Elegant Trim in a bow and adhere to the right hand side of the card using a glue dot


Many thanks for visiting today. You are appreciated!

Product List

Monday 25 April 2022

Stampers Showcase Blog Hop -Annual Catalogue Pre Order


Hello and welcome to the April Stampers Showcase Blog Hop. This month we have been making projects with products from the new Annual Catalogue. 

I am so excited for all my customers to see what is in the new catalogue. It is all so beautiful!

One of the first suites that caught my eye was the Hues of Happiness Suite with its stunning blooms and beautiful sentiments. I have created my card with the Happiness Abounds Bundle and two new In Colours Sweet Sorbet and Parakeet Party. Don't you just love the vibrant colours!


  1. Start with a Sweet Sorbet card base measuring 21cm x 14.9cm scored and folded in half
  2. Cut a piece of the Sweet Sorbet Designer Series Paper to measure 10cm x 14.3cm and glue to the card base
  3. Cut a piece of Basic White card stock to measure 8.5cm x 12cm. Use the Die to run up the long side of your piece of card stock to create decorative edge
  4. Stamp the large bloom once and the smaller bloom three times in Sweet Sorbet ink on Basic White card stock. Colour with Sweet Sorbet Stampin' Blends and cut out using coordinating die
  5. Stamp the 4 sets of leaves in Parakeet Party ink on Basic White card stock. Colour with Parakeet Party Stampin' Blends and cut out using coordinating die
  6. Stamp the 2 different leaves in Parakeet Party ink on the background layer of Basic White card stock and do not colour them. Glue the Basic White card stock with the die cut edge to the card front.
  7. Stamp the sentiment in Sweet Sorbet ink on Basic White card stock and die cut using the label from the All That Dies
  8. Arrange the flowers and leaves and secure to the Basic White layer using Dimensionals and glue
  9. Cut three 2cm piece of the Parakeet Party Metallic Woven Ribbon and use Glue Dots to adhere to the area behind flowers, leaves and sentiment layer as in image above. Then fray the ribbon
  10. Secure the Sentiment layer using DImensionals to the bottom left of blooms
  11. Secure 6 of the Sweet Sorbet Matte Decorative Dots around the blooms and sentiment. 


Please click on the next blog below to keep hopping for more amazing 2022-2023 Catalogue inspiration!


Many thanks for visiting my blog today. You are appreciated!

Product List

Friday 15 April 2022

CASe the Annual Catalogue Card


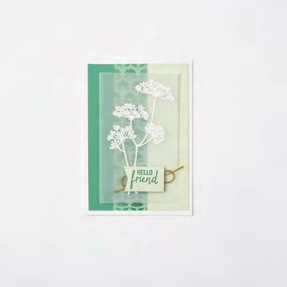
  I wanted to create something simple today and something that I have not tried before. I have found a card I liked and CASed it from the Annual Catalogue  I settled on the beautiful green card on page 114 of the Annual Catalogue. Image of the card I CASed below


Image © Stampin' Up!®


 I love the simplicity and softness of the card above and decided to use the Honeybee Home Bundle and use yellow as my card colours and swap the centre panel out for a embossed layer with the Hive 3D Embossing Folder. The centre panel in the above card was created using a decorative mask and blending brushes.


  1. Start with a Basic White card base measuring 21cm x 14.9cm scored and folded in half
  2. Cut a piece of Crushed Curry card stock to measure 14.3cm x 4cm
  3. Cut a piece of Bumblebee card stock to measure 14.3cm x 3cm and run this through your Cut & Emboss machine with the Hive 3D Embossing Folder
  4. Cut a piece of So Saffron card stock to measure 14.3cm x 4cm
  5. Glue the Crushed Curry piece to the card base on the left hand side, leaving a small border
  6. Glue the So Saffron piece to the card base on the right hand side, leaving a small border
  7. Glue the Embossed Bumblebee layer to the centre of your card, leaving the border above and below
  8. Stamp the floral spray and the bee on a 8cm x 12.3cm pice of  Vellum in Versamark™Ink, sprinkle with White Embossing Powder and set with the heat tool. Use a small amount of glue behind the stamped images and adhere to the centre of your card
  9. Stamp the Sentiment on a 2cm x 5cm piece of So Saffron card stock in Crushed Curry ink. Use the tailored tag punch to banner the end or use paper snips to create the banner.
  10. Cut a 15cm length of the White Baker's Twine and tie in a bow. Adhere to the bottom of the card where the sentiment will be placed using a glue dot
  11. Secure the sentiment on the top of the bow using dimensionals


Many thanks for visiting my post today. I hope to have inspired you to create something from the one of catalogues. It was fun to CASe this card!

Take care!

Product List